A common question while planning/deploying Lync Server and Skype for Business Server is:
When do we need to configure Internal Web Services Override FQDN?
The answer to this is quite simple — we only need it if we have to split SIP traffic from HTTP/HTTPS.
We know that this answer will raise more questions, so first we should start with a little story. The Internal Web Services Override FQDN settings was introduced in Lync Server 2010. This was also the first version to support DNS Load Balancing in an Enterprise Pool.
If we just use Lync/SfB Clients, they are aware of DNS Load Balancing. But what about a web browser? A web browser will try only the first IP Address returned by the DNS and, if this server is down, we will get a “This page can’t be displayed”. Supposing we configure Round Robin in the DNS Server, we will eventually have a different IP Address as the first result.
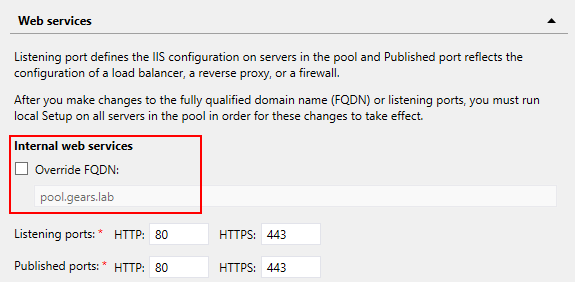
The Internal Web Services Override FQDN setting only makes sense in an Enterprise Pool. In addition, we can configure it in Topology Builder > Pool Properties:
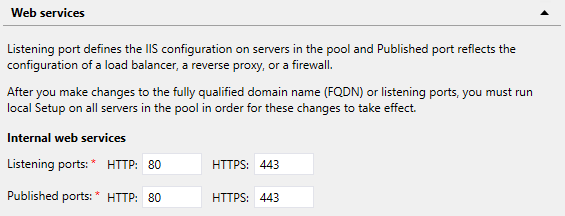
However, in a Standard Pool this option is disabled:
In order to configure the Internal Web Services Override FQDN in a Enterprise Pool we need to follow a few steps. As some of them can cause service disruption, we should plan these changes accordantly:
Step 1 – Enable override
In the Topology Builder, we select the Enterprise Pool that we want to change and enable:
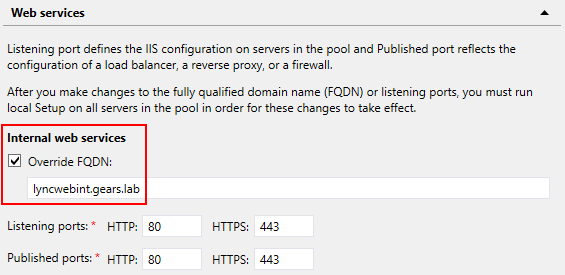
Note: This FQDN must be unique, we cannot use an existing pool FQDN or web services external FQDN.
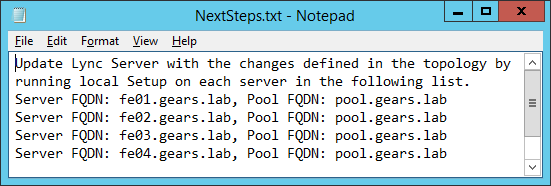
We publish the new Topology and wait for all servers to receive the new change:

Next Steps
Get-CsManagementStoreReplicationStatus |ft

Step 2 – Configure the Front End Servers
On each Front End that belongs to the pool we configured, we need to re-run Deployment Wizard Step 2:

Request and assign certificates so as to include the new FQDN in the SAN certificate of Front End:
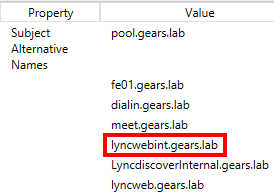
After restarting the Services, the Front Ends will be ready.
Step 3 – Configure Load Balancer
For this we need to follow the vendor guidelines. A complete list of supported Load Balancers is available here:
Load balancer partner qualification requirements for Lync Server
https://docs.microsoft.com/SkypeForBusiness/lync-cert/hardware-load-balancers
Skype for Business Server – Load Balancers
https://docs.microsoft.com/SkypeForBusiness/certification/infra-load-balancers
Note: A common misconfiguration is to use port 443 to check if the server is able to handle requests, even though we should always use port 5061 to know if the server is working. Each Front End will only listen on port 5061 if the Front End Service is up and running.
Step 4 – Change the DNS Records
The final step is to make sure that the clients will use the newly configured Load Balancer. In order to achieve this, we need to create/modify the DNS Records as the examples in the following table:
| FQDN | Type | IP/Destination |
|---|---|---|
| lyncwebint.gears.lab | A | Load Balancer IP Address assigned to the virtual service |
| lyncdiscoverinternal.gears.lab | CNAME | lyncwebint.gears.lab |
| meet.gears.lab | CNAME | lyncwebint.gears.lab |
| dialin.gears.lab | CNAME | lyncwebint.gears.lab |
| lyncadmin.gears.lab | CNAME | lyncwebint.gears.lab |
Conclusion
We now have the HTTP/HTTPS configured to use the Load Balancer and the pool using DNS Load Balancing.
As a final note, we want to point out that in a full “balanced” pool the IP Address will be the Load Balancer. In this way, we don’t need to have a FQDN for SIP and another for HTTP/HTTPS.