Here is a step by step tutorial how to add a new SIP Domain to OCS and then migrate all users to the new domain.
One thing that we don’t need to worry about is the Users Contact Lists, since OCS stores contacts as Unique ID, rather as SIP Address. This allow us to change user SIP Address without messing up users Contact Lists.
Here are the steps necessary to add a new domain and “move” users:
Step 1 – Adding the New SIP Domain to our Organization
The first thing to do is add a new domain – this is achieved by using OCS 2007 R2 Management Console.
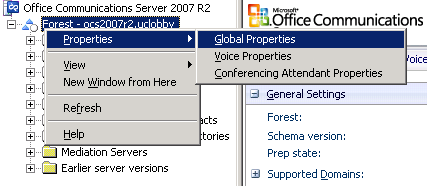
Right click on Forest, Properties -> Global Properties:
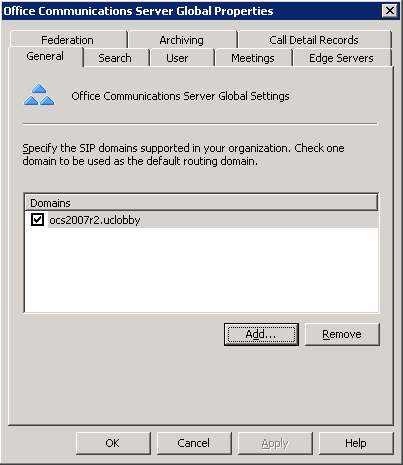
In the General tab, select Add… and write the new domain, then click OK.
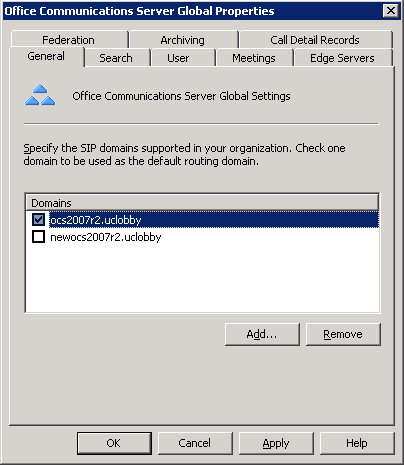
Now we can notice that the new domain is shown there. If we want we can select the new domain as default. The ticked check box represents the default SIP Domain.
If we have a Edge Server, and want the new domain to be able to communicate using it, then we must configure it first. If not, you can skip the following steps and go to Renewing Certificates:
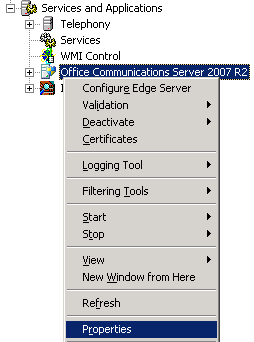
In Properties, select the Internal tab and add the new sip domain with the Add Domain… option:
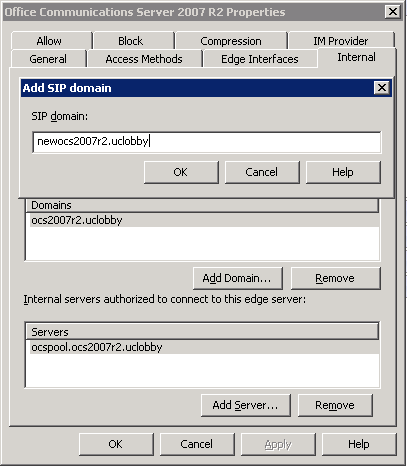
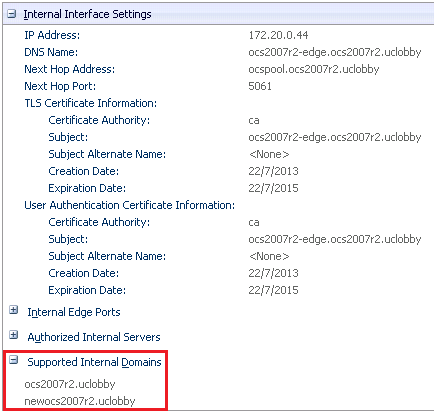
After adding the domain and applying, refresh and go to Internal Interface Settings and check if the new sip domain is being shown there:
Step 2 – Renewing Certificates with Certificate Wizard
Front End Server
We need to renew certificates on all Front End Servers to additionally include FQDN sip.<new SIP Domain>.
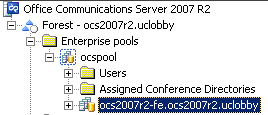
In the OCS 2007 R2 Management console explore the tree and select one Front End server:
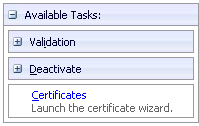
Then launch the Certificate Wizard — we can find this option on the right pane:
Or right click on the Front End and choose Certificates:
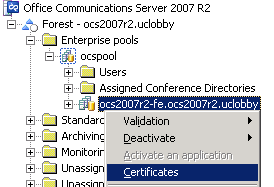
Select Create a new Certificate, then Send the request immediately to an online certification authority.
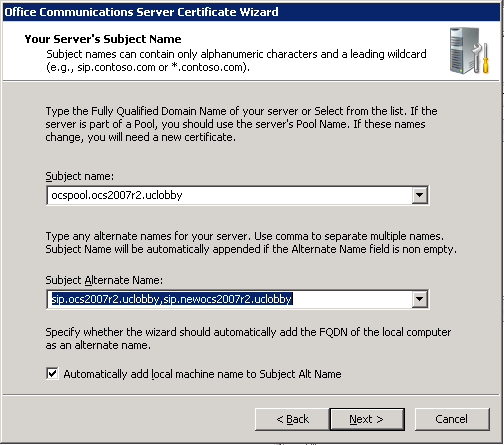
On the Name and Security Settings screen, change the Bit length to 2048 and then click Next. Make sure that the new SIP is included in Subject Alternate Name.
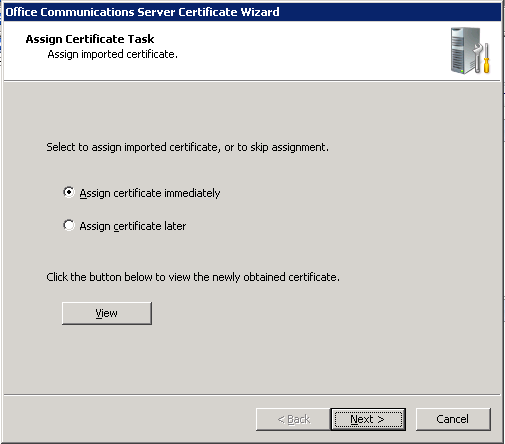
If all the requests were successful, we can assign the certificate immediately. Remember that the certificate will only be used by OCS server after restarting the services.
The OCS Certificate Wizard will not change the certificate associated with the OCS Web Services. To change this open IIS Management console and then select Default Web Site -> Properties -> Directory Security:
Note: The following print screens were taken in IIS 6,0.
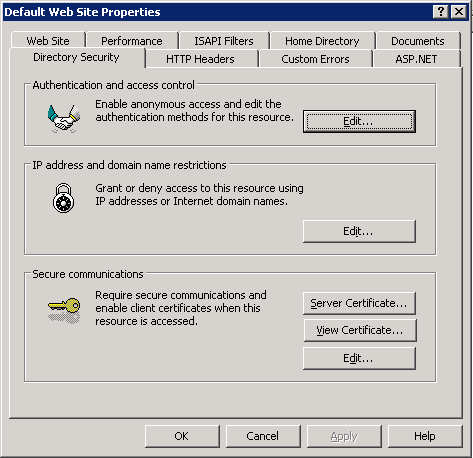
Select Server Certificate… to replace the certificate.
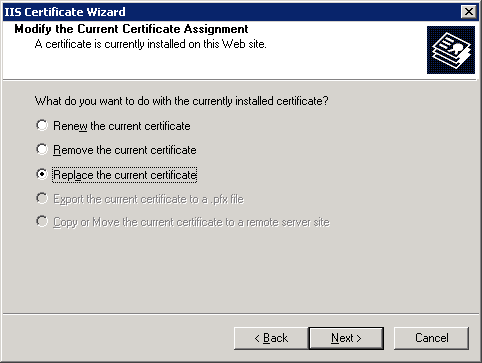
We don’t need to restart IIS for the new certificate to be assigned.
Edge Server
In the Edge Server we only need to update the Access Edge Public Interface certificate. First, open the Edge Computer Management (Administrative Tools -> Computer Management), then right click on Office Communications Server 2007 R2 and select Certificates:
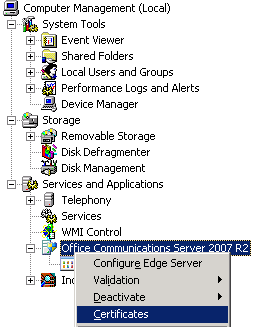
In the wizard, change Bit Length to 2048 and confirm that the Subject Alternate Name includes the new sip domain.
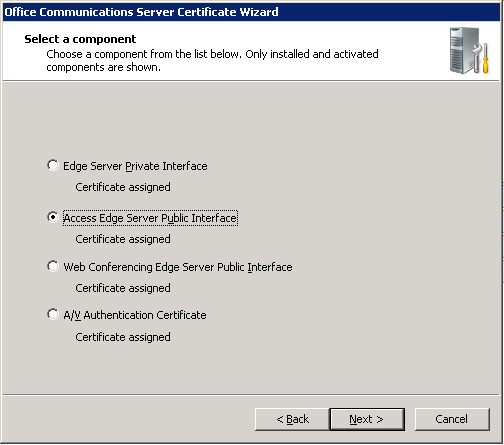
Usually this will be an offline request, so save to a file, issue in the proper CA, import it on the OCS Edge and then assign it to the Access Edge Server Public Interface. You can use the Certificate Wizard All the previous steps. If we use the same certificate on all Public Interfaces, then assign the new certificate to all of them.
After assigning the certificate, restart OCS Edge Services.
Step 3 – Creating DNS Records
To ensure that users can log in with automatic discover, we add the following records:
| DNS | FQDN | Type | Port | IP/Destination |
|---|---|---|---|---|
| Internal | sip.<new SIP Domain> | A | N/A | OCS Pool IP (Enterprise Edition) OCS Front End IP (Standard Edition) |
| Internal | _sipinternaltls._tcp.<new SIP Domain> | SRV | 5061 | sip.<new SIP Domain> |
| External* | sip.<new SIP Domain> | A | N/A | OCS Access Edge Interface Public IP |
| External* | _sip._tls.<new SIP Domain> | SRV | 443 | sip.<new SIP Domain> |
| External** | _sipfederationtls._tcp.<new SIP Domain> | SRV | 5061 | sip.<new SIP Domain> |
*Only needed if we want to enable external access to the new domain.
**Only needed if we want to enable federation access to the new domain.
Step 4 – Changing Users SIP Address
We can change users SIP Address with the following cmdlet in any Front End with PowerShell installed:
get-wmiobject -class msft_sipesusersetting | where {$_.UserDN -like “*<OU>” -and $_.Enabled -eq $true} | Foreach-object { $_.PrimaryURI = $_.PrimaryURI.Replace(“<Old SIP Domain>“, “<New SIP Domain>“); $_.put() | out-null }
Replace <Old SIP Domain>, <New SIP Domain> with the right values, and <OU> if you want to specify a OU. It’s highly recommended to test in a small group of users before changing all users.
To change all users that are enabled to OCS, run this:
get-wmiobject -class msft_sipesusersetting | where {$_.Enabled -eq $true} | Foreach-object { $_.PrimaryURI = $_.PrimaryURI.Replace(“<Old SIP Domain>“, “<New SIP Domain>“); $_.put() | out-null }
Step 5 – Changing primary SMTP Email Address (Optional)
If we need to ensure that Outlook and Communicator integration isn’t affected, we need to change all users’ primary SMTP Email Address to be the same as the new sip address.
Step 6 – Rebuild the Address Book
After all the changes performed in the previous steps, we need to rebuild the Address Book. To do this in OCS, we need to execute ABServer, which is located in “C:Program FilesMicrosoft Office Communications Server 2007 R2ServerCore”, with the following parameters:
ABServer.exe -RegenUR
ABServer.exe -SyncNow
Step 7 – Refresh Sign-in Address (Optional)
This step will prevent users from having to manually change Sign-in Address on Communicator (MOC).
After changing the user SIP Address, we can force Communicator Client to update Sign-in Address, by creating a Logon Script with the following command:
reg delete HKCUSoftwareMicrosoftSharedUcclient /f
Final notes
Changing SIP domains isn’t an easy decision, so think first if you really need to change the domain.
If we change it, we will make an impact on partner federation and PIC federation. As previously stated, the corporate user Contact List will not be affected by this change. Nonetheless, our federated partners will need to manually add the contacts to their contacts list, since they are stored in their contact list with sip address.
Partners with closed federation will need to configure their Edges Servers to allow the new domain.
Regarding PIC federation, we need to submit a new request by adding the new sip domain to our existing PIC Provisioning: